|
| by Lynn Anderson |
 |
| by Jessica Hill |
 |
| Designer Unknown |
 |
| Designer Unknown |
 |
| by Diane Browning |
|
| by Lynn Anderson |
|
| by Jessica Hill |
|
| Designer Unknown |
|
| Designer Unknown |
|
| by Diane Browning |
 This mini file folder treat holder is the perfect Valentine surprise. It's quick and easy to make with the perfect handmade touch that says you care!
  Cut a 3 x 5 inch rectangle out of two sided card stock or designer paper. Score the long side at 2 1/4 and 2 1/2 inches. Make the file folder tab on the longest half by using the envelope maker. Simply notch the top left, flip the rectangle and notch at 1". Then cut the small section off
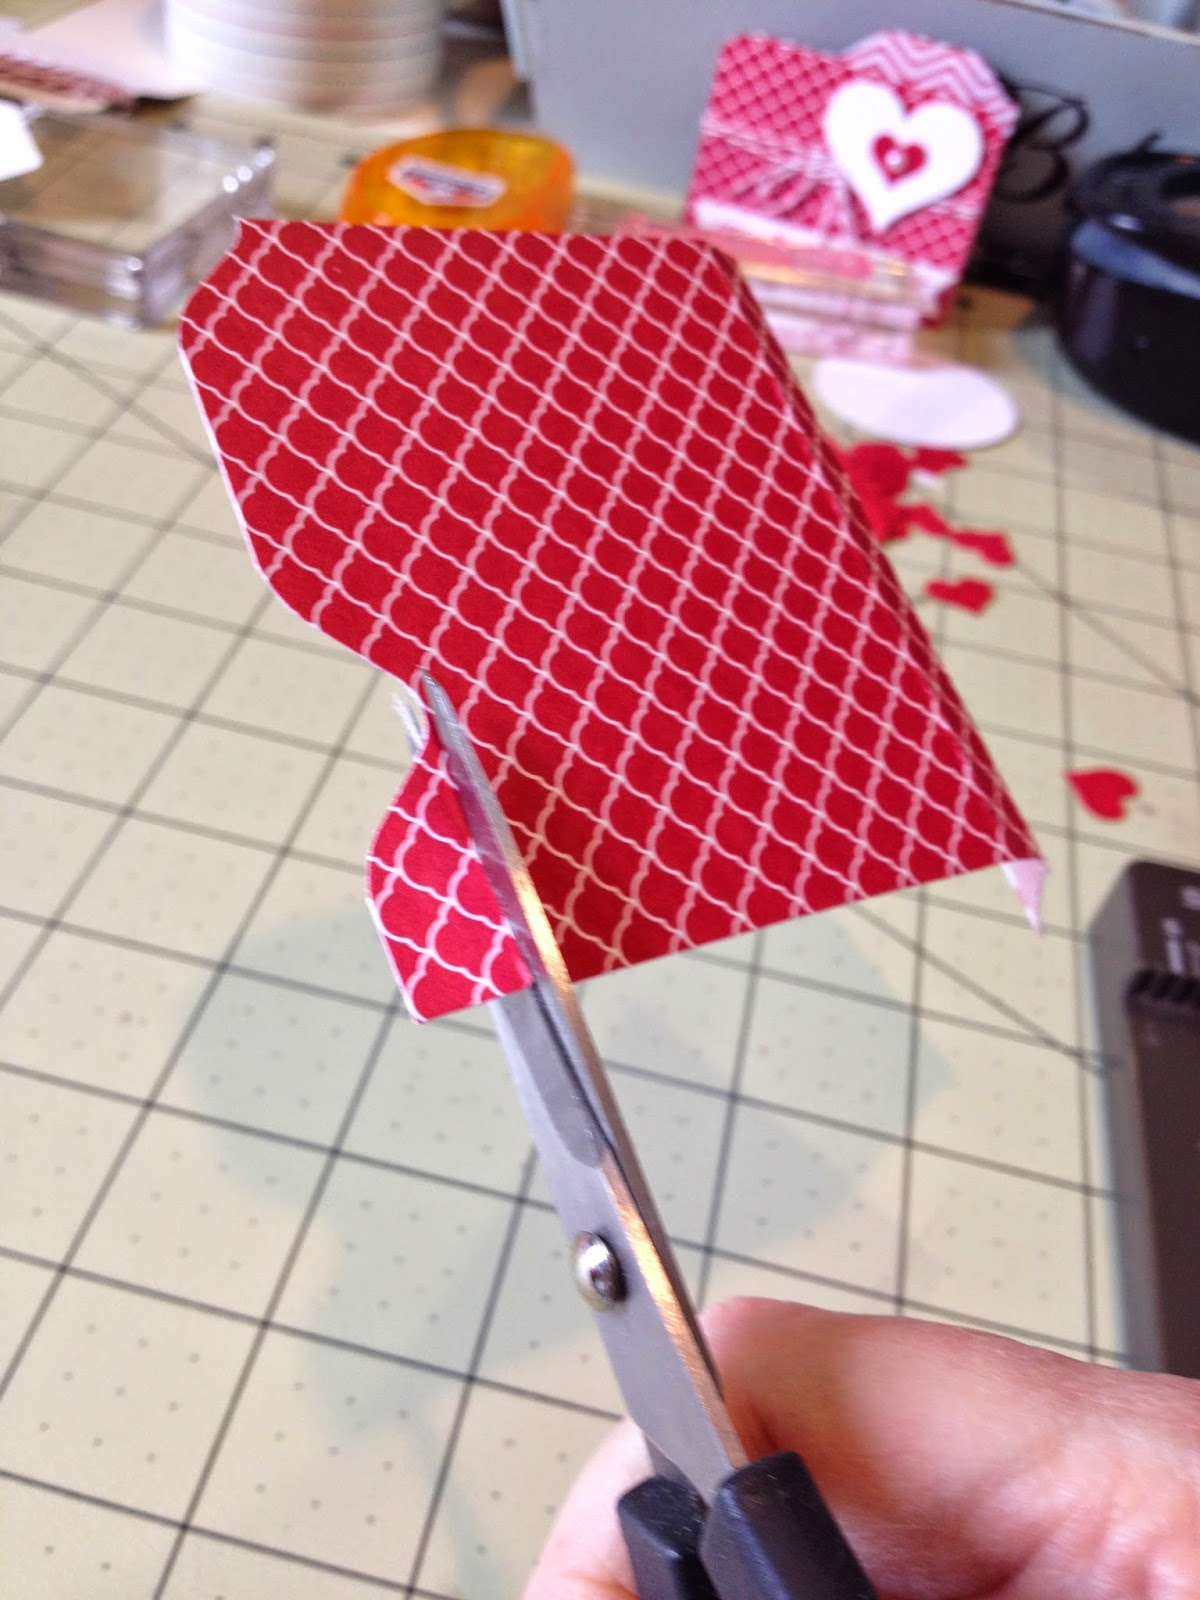 between the notch and the right side of the folder top. (see pictures). Cord or baker's twine was wrapped around the front cover 3 times and tied with a bow. The heart was cut from embossed card stock to give it a little extra umph. It was attached with Stampin' Dimensionals just above the twine wrap. A small heart from the Itty Bitty Punch Pack was glued to the top and adorned with a pearl. The sentiment came from the Sheltering Tree Stamp Set and was printed with Real Red Ink and attached with dimensionals.
  A Hershey's candy bar makes the perfect sweet treat for Valentine's Day! It just takes a minute to wrap it in scrapbook paper and add heart themed embellishments. I had fun making them as party favors for my Stampin' Up scrap club. Be sure to use a strong adhesive - the folds add extra pressure. Fuse or Sticky Strip work well. I used stickers and ribbon from my stash to decorate. So cute and so yummy!
 It's great to be back after a week in sunny Orlando, Florida! I had a blast at the Stampin' Up Leadership Convention and of course a little extra fun on the side at Epcot and Downtown Disney! Can't wait to tell you all about it and show you some of the beautiful cards and projects I saw. But first, we've got to squeeze in Valentine's Day!
  embossed cover and heart shaped cutout. I'll add the product links later but wanted to get the pics up ASAP since the day of love is coming soon! The heart punch I used is on sale this week as a Weekly Deal so check out my website for materials.

 I glued a loop of raffia to the back
 There's nothing like curling up with a good book on a crisp Fall day! Welcome Fall with all the right colors in this simple bookmark that reminds us to count our blessings. It's perfect way to treat your book club, thank a friend, or create a "happy" to spice up a table setting. All Stampin' Up materials may be purchased online at www.lyndafalconer.stampinup.net
 We're "Falling" back into the swing of things as the weather starts to turn cooler and the leaves begin to fall! It's my favorite time of year - from now til Christmas! It's all good! Planning to decorate for fall but make Christmas cards at the October Scrap Club. Hoping the weather is cool enough for a big pot of chili! If you live in the area, you're invited to join us. Just register at my Stampin' Up website. www.lyndafalconer.stampinup.net.
  The top card uses the Hardwood and Wondrous Wreath stamps while the bottom star card is made from the Bright and Beautiful stamp set. Both sets have coordinating die cuts. Let me know if you need anything!
 I had a blast planning with a chalkboard theme and some silliness thrown in on the side. My friend Janice volunteered her talents to monogram gorgeous tote bags for everyone. I filled them with a paper pack, 2 make and take projects, mini- notepad, giant wooden clothespin, ribbon pack, and of course CHOCOLATE!! The table was set with party favors- giant sun glasses and candy bracelet, with a cup of trail mix to start the day.
  I decorated the kitchen island with a giant mossy mushroom and greenery on a burlap runner. Of course I had to add a little bling for the "Divas"! I made a quick banner for the mantle that said "Scrap Divas" out of a black chalkboard paper banner. I used 3 layers on top of each banner piece - a flattened aqua cupcake holder, a small doily, and a glittered letter.
  We made a layout with stitching on it (a first for most of us!) and a cute box with 4 notecards inside for our make and takes. Stay tuned for pics of those with directions! Thanks for checking in! Enjoy these last days of summer!
 last week using the new Flower Patch Stamp Set to make this card. The new photopolymer stamps took a little practice but we liked being able to see through the stamps. The images came out crisp and clear. We used the orange and white flower paper from the new Flower Pot Designer Series Paper. The orange frame is from the On Film Framelit Die and we used a decorative label punch to highlight the sentiment. The large flower was stamped with Blackberry Bliss Ink and the pink flower uses Melon Mambo Ink. After stamping and punching the flowers, cut each flower petal in towards the center to separate the petals a little so you can curl them with your finger. On the purple flower I cut just to the second row of petals on the top flower and in about 1/2 inch on each petal on the bottom solid layer. Use dimension dots between the flower layers and to make the sentiment stand out.
| |||||||||||||
| |||||||||||||
 I have a new favorite thing! Stampin' Up 's Everyday Occasions Card Kit made 20 + adorable cards for all occasions.

 It was so easy to punch out shapes, stamp sentiments, and assemble the designs from the pictures in the color brochure. Of course I had to venture out on my own and create some originals too! The kit is all inclusive and comes with stamps, a clear block, 2 ink spots, baker's twine, punch outs including some glitter paper, buttons, arrow clips, and pop dots. You'll need your own tape runner and scissors. I added a few ribbons and trims from my stash. I have enough left overs to embellish lots more cards and tags! These cards went together in a snap with awesome results! Perfect for the beginner or experienced scrapper! You've got to try this!!! Order at my website www.lyndafalconer.stampinup.net or by clicking the link below.


 |
| Angled Tag Topper Punch #133323 |

 |
| Clear-Mount Block E #118484 3-7/16" x 4-7/16" |