There's something about the changing seasons that lift and refresh my spirit! We had our first really crisp, cool, fall day this weekend! It was the perfect follow up to our Fall Scrap Night. We had a great time making Thanksgiving candles and Halloween Treat Boxes after indulging in a pot of beef stew and cornbread. Just had to try some of those cute Halloween treats from Facebook and Pinterest but the brownies with caramel icing (a mix!) were the big hit!
  I kept the antique (grandma's) quilt on the table and added a pumpkin, fall leaves, and burlap placemats. Had to show off my bargain fall cloth napkins from Home Goods in Madison, MS! Always find goodies there! Cupcake holders were filled with candy and a cupcake topper. I used Martha Stewart's masks (on sale at Michael's) for place cards and wrote guests names in the corner. They were perfect for photo ops too but we always forget once we start eating! Go figure! The masks really stood out on the porch pumpkins and a covered cake plate I used for more decorations.
The party favors were made from Stampin' Up's Witches Brew Designer Series paper. I cut out a library card shape from my Silhouette, then decorated it with the Owl Builder (Item # 118074) and Bitty Banners Framelits (Item #129267). So simple!
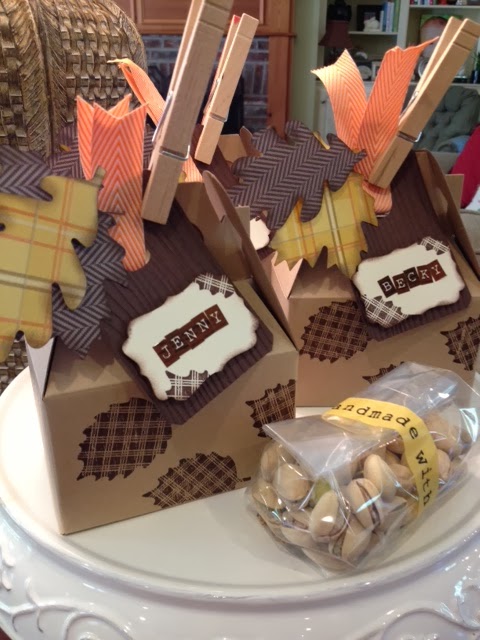
 The real fun begins at craft time! We made Thanksgiving candles from $3.50 Wal-Mart candles and some scrapbook supplies. We wrapped the candle with two layers of Sweater Weather Designer Series Paper (Item # 132184 Stampin' Up). You need to use a heavy adhesive such as two sided tape to get them to stick. Simple rectangles were used for the labels with the sentiment stamped from "Harvest of Thanks" stamp set (Item # 131736) and Apothecary Accents Framelit die cut (Item #127003) - my new favorite! If you need to know how to do the 2 color stamp just leave a comment and I'll give directions. We punched both sides of the sentiment and ran a ribbon from one side, under the sentiment, and around the candle. Then we tied it in a bow on one side. It makes a beautiful fall decoration for your home or the perfect hostess gift for Thanksgiving dinner!
 Finally, we finished off our "Ghouls Night Out" with a Halloween treat box, perfect for candy, cookies, muffin, cupcake - or any treat for someone very special. Again we used the Witches Brew Designer Series Paper (Item # 132185) and made a banner. Double stick tape was placed down the center and glitter applied on top to get the glittered stripe. Only attach it to the top so you can get the box open. A small glue dot near the bottom will hold the bottom of the banner piece down when the box is closed, but allow easy access when you want to open it. We topped the banner with a 2 1/2 inch circle edged with green tulle ribbon (Maya Road I think). The rosette was punched from a Tim Holtz die cut and topped with a decorative label punch (Item # 120907) and scallopped oval (Item # 119856) stamped with Beware Bat from "Halloween Bash" stamp set (Item #130580).
Hope you have a chance for a "Ghouls Night Out" with friends this season! If you don't have a Stampin' Up Demonstrator, materials can be purchased at my website at www.lyndafalconer.stampinup.net
I'd love to hear from you!