
Friday, February 14, 2014
Love Is In the Air with SU Hearts A Flutter
Sunday, December 15, 2013
Christmas Party Time with SU Tags

These girls know how to party!!! We had a blast being silly, exchanging ornaments, EATING, and making Christmas tags at the Scrap Club party Friday night. I will have to get Suzie's recipe for Cranberry/Pecan/White Chocolate Clusters - a big hit! We feasted on fruit salad, chocolate covered strawberries, pork loin, sausages, brownies, onion dip, and so many more treats! We shared stories of our adventures and worked together - ahem! to create four gift tags for those special people that appreciate a handmade tag!
 The first tag came from Becky Roberts at Inking Idaho. She actually sells tutorials for 12 Designs for the Twelve Days of Christmas so I splurged on a little extra holiday inspiration! Check out her her website at www.inkingidaho.com. I used some retired tinsel trim to tie the chevron ribbon instead of baker's twine. I especially like the way she used two circle punches to cut a ring for the ribbon to tie on to. It uses the Festive Flurry stamp and punch.
The red "Oh What Fun" tag is actually a gift card holder. The template also came from Becky Roberts at Inking Idaho. I used the embossing folder to create an oval frame that perfectly fits the large oval punch for the sentiment.
I just had to have a Santa Claus in the mix so he peeks out from the top of a snowflake on a very quick and simple tag. Oh what fun! Supplies are available at www.lyndafalconer.stampinup.net
or email me at lyndafalconer57@gmail.com for more information.
Snow Flake Tag: Festive Flurry Framelits Dies Item #132193, Festive Flurry Stamp Set Item #131781, Frosted Finishes Embellishment Item #132150, Sentiment from Embellished Events Item #126497
Oh What Fun Gift Card Holder: Christmas Messages stamp Item #131790, Textured Impressions Designer Frames Item #123130
Santa Claus: Santa's List stamp set Item #131811, Festive Flurry Framelits Dies Item #132193, 1.5 and 1.25 inch circle punches
Monday, December 9, 2013
Let It Snow!!!

 Just had to share two pics from our hotel window in St. Louis last week during the snow. Most snow was south of the city as we found out on our trip home!! The city was beautiful with the perfect dusting! We had time to tour the Westward Expansion Museum in the court house and saw the courtroom where the Dred Scott case was tried. Beautiful architecture and woodwork. They were going to have a period Christmas dance with people in costume the day after we left. That would have been fun to learn to dance the minuet or whatever they did in those days!
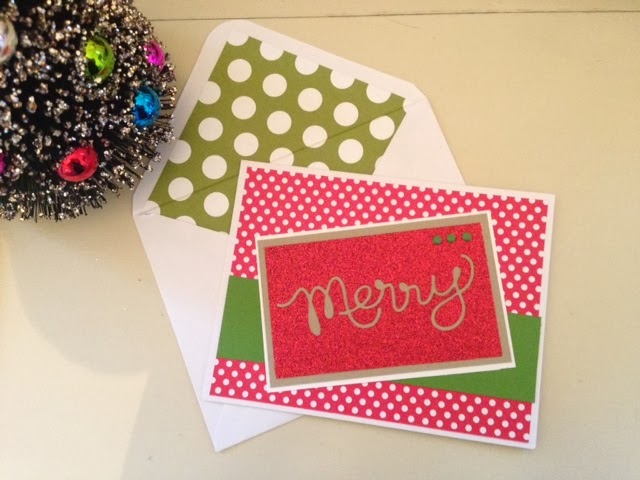
Today's post gives 2 ideas for what to do with those reverse images left when you cut out the Expressions Framelit
Sunday, December 8, 2013
Quick Christmas Cards and Tags with SU


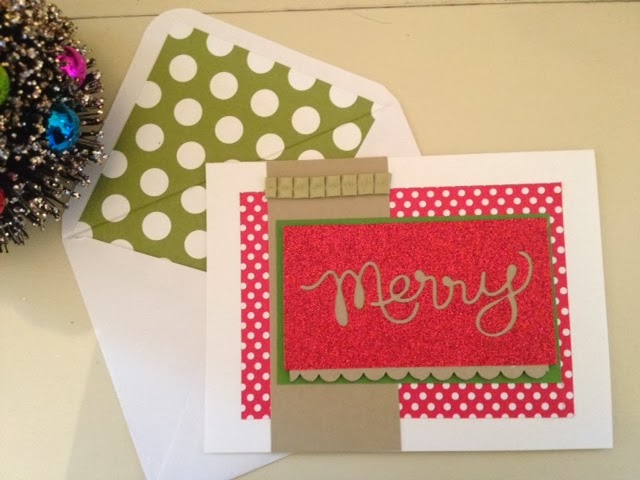
On a lighter note - it's almost Christmas!!! Can't wait to finish decorating and get treats made for our scrap group - they'll be here Friday for our Christmas party. I'll share pics here as soon as I get everything ready. For now - here are some quick cards I made with leftovers. I'm sure you'll recognize the pieces. The elf legs idea is from a You Tube video and made from the Top Note Die Cut - (Stampin' Up). That mischievous elf keeps turning upside down! Enjoy!
Tuesday, November 19, 2013
Prize for Sharing!
 |
| Giant presents at Fashion Mall in Las Vegas Circa 2007 |
 Had 10 lovely ladies over for chili and Christmas card making last Friday. We had a blast and as usual, I overplanned so we worked until almost 10 pm! We made 2 cards and a tag, all inspired by my pinterest searches. Not sure what the protocol is for borrowing inspiration so let me know if I step on any toes! The Santa tag was adapted from one by Jenn Tinline at www.stampwithjenn.com. I love the way she used half the apothecary punch (Stampin' Up) for Santa's beard. Materials used and how to get them are posted below.
  The second card looked soooo "Delta" - must be the burlap - quite the rage in Mississippi! It was designed by Canadian Maggie Patterson at www.ilovepapercrafts.com and I didn't change a thing. This was quick and easy so could be reproduced in mass for your family card. Maggie does simple, beautiful cards that would be great for a beginning card maker. She even has her own cardmaking book! Check out her website if you get a chance.
So who's going to win??? I promise the prize will be worth your while!!! I'd love to hear suggestions for my blog - also need to know what camera to get - still taking pictures from my iphone and I'm not happy with the clarity online. Look forward to hearing from you!
Lynda aka Lynderclause
Order supplies at www.lyndafalconer.stampinup.net
Santa Tag supplies:
Apothecary Accents Framelit Item #127003
Real Red Cardstock Item #102482
Black Cardstock Item #121045
Glimmer Paper - Champagne Item #127885
Christmas Tagables Photopolymer Stamp Set Item # 134623
Classic Stampin Pad - Real Red Item #126949
1/8 " Taffeta Ribbon - Black Item #119261
Red striped ribbon is retired.
Burlap Ribbon Card supplies:
Beautifully Baroque Embossing Folder Item #130917
Christmas Collectibles Ornament Punch and Stamp Bundle Item #133283
1 3/4" Burlap Ribbon Item #132140
Linen Thread Item #104199
Large Pearl Basic Jewels Item #125577
Christmas Tagables Photopolymer Stamp Set Item # 134623
Medium Envelopes - Crumb Cake Item #107297
Cardstock - Crumb Cake Item #120953
Cardstock - Cherry Cobbler Item #119685
Wednesday, November 13, 2013
Christmas Card Jingle

 Spent the weekend pinning Christmas ideas from Pinterest and checking out my latest splurge! I bought 2 video tutorials for Christmas card, tag, and favor ideas so I'm anxious to tweak these ladies' fabulous designs and learn new skills. A girl's got to have skills, you know!!! The first was from Becky Roberts at www.inkingidaho.blogspot.com , a fabulous Stampin' Up Demonstrator whose style I LOVE! You can check out her blog and video tutorials by clicking her name above. I made the Dixie Cup favors and Snowflake Tag box so far. Need more time!!!
 Will save the other tutorial for later after I've made something from in. Please check out my Pinterest Board called Christmas (Lynda Falconer) for lots of card ideas. Might save you some time if your taste is similar to mine.
 Better get back to work. 2 more projects to go for Friday's workshop and can't decide what to do first!! I'm so grateful for all of you and this crafty life I live! Here's a card we made at a women's fellowship group with about 12 women ages 40-90ish. Many had never scrapped before and all their cards turned out beautifully! It was so exciting to see how proud the ladies were of what they made! Doesn't get much better than that! Have a blessed Thanksgiving!
Lynda
Red Bird Christmas Card: Order Supplies Here
Bird Builder Punch Item #117191
Northern Flurry Embossing Folder Item #120902
Woodgrain Embossing Folder Item #127821
Apothecary Accents Framelits Item #127003
Whisper White Craft Ink Item #101731
Gold Metallic Encore Ink Item #132141
Christmas Messages Stamp Item # 131790
Whisper White Card Stock Item #100730
Real Red Cardstock Item #102482
Monday, October 21, 2013
Celebrate Fall with Stampin' Up Harvest of Thanks Candle
 There's something about the changing seasons that lift and refresh my spirit! We had our first really crisp, cool, fall day this weekend! It was the perfect follow up to our Fall Scrap Night. We had a great time making Thanksgiving candles and Halloween Treat Boxes after indulging in a pot of beef stew and cornbread. Just had to try some of those cute Halloween treats from Facebook and Pinterest but the brownies with caramel icing (a mix!) were the big hit!
  I kept the antique (grandma's) quilt on the table and added a pumpkin, fall leaves, and burlap placemats. Had to show off my bargain fall cloth napkins from Home Goods in Madison, MS! Always find goodies there! Cupcake holders were filled with candy and a cupcake topper. I used Martha Stewart's masks (on sale at Michael's) for place cards and wrote guests names in the corner. They were perfect for photo ops too but we always forget once we start eating! Go figure! The masks really stood out on the porch pumpkins and a covered cake plate I used for more decorations.
The party favors were made from Stampin' Up's Witches Brew Designer Series paper. I cut out a library card shape from my Silhouette, then decorated it with the Owl Builder (Item # 118074) and Bitty Banners Framelits (Item #129267). So simple!
 The real fun begins at craft time! We made Thanksgiving candles from $3.50 Wal-Mart candles and some scrapbook supplies. We wrapped the candle with two layers of Sweater Weather Designer Series Paper (Item # 132184 Stampin' Up). You need to use a heavy adhesive such as two sided tape to get them to stick. Simple rectangles were used for the labels with the sentiment stamped from "Harvest of Thanks" stamp set (Item # 131736) and Apothecary Accents Framelit die cut (Item #127003) - my new favorite! If you need to know how to do the 2 color stamp just leave a comment and I'll give directions. We punched both sides of the sentiment and ran a ribbon from one side, under the sentiment, and around the candle. Then we tied it in a bow on one side. It makes a beautiful fall decoration for your home or the perfect hostess gift for Thanksgiving dinner!
 Finally, we finished off our "Ghouls Night Out" with a Halloween treat box, perfect for candy, cookies, muffin, cupcake - or any treat for someone very special. Again we used the Witches Brew Designer Series Paper (Item # 132185) and made a banner. Double stick tape was placed down the center and glitter applied on top to get the glittered stripe. Only attach it to the top so you can get the box open. A small glue dot near the bottom will hold the bottom of the banner piece down when the box is closed, but allow easy access when you want to open it. We topped the banner with a 2 1/2 inch circle edged with green tulle ribbon (Maya Road I think). The rosette was punched from a Tim Holtz die cut and topped with a decorative label punch (Item # 120907) and scallopped oval (Item # 119856) stamped with Beware Bat from "Halloween Bash" stamp set (Item #130580).
Hope you have a chance for a "Ghouls Night Out" with friends this season! If you don't have a Stampin' Up Demonstrator, materials can be purchased at my website at www.lyndafalconer.stampinup.net
I'd love to hear from you!
Subscribe to:
Posts (Atom)